
VGA4EVA Programming Guide
(work in progress, will be periodically updated)
Longer than Normal Disclaimer: I’m no computer expert, and definitely not some kind of Arduino coding genius. I was hesitant to even support this stuff as a DIY project because of the computer-related tech support questions that I’m predicting people will ask that I won’t be able to answer. That hesitation was outweighed by how annyoing it can be to source VGA Test Signal Generators, and also my hope that this project will act as a lightning rod for more community discussion and free resources around using microcontrollers for things like this. I think there’s a lot of untapped potential. Please be advised that I approached the use of Arduino in a video synthesizer much the way that I approach hardware hacking or circuit bending — “poke it and see what happens, and then keep poking it until it does something neat”. That’s what I’m sharing with you. If you have specific questions about how to get it to do a certain thing that isn’t covered in this guide, I can almost certainly assure you that I won’t be able to answer your question intelligently. Same goes for if you can’t get the Arduino software working on your particular computer for some reason. It’s not that I don’t want to, or that I won’t try to help if you’re exhausted every other resource, it’s just that I’m not really the right person to ask.
VGA4EVA uses Arduino to generate the vertical and horizontal video sync pulses that are needed to turn on a monitor. In the past, CHA/V-based video synthesizers relied on off-the-shelf VGA monitor testers to generate a video signal. Arduino is an easy to use and open platform that offers some customization that wasn’t possible with the monitor testers. Code can be copied and pasted and either left alone, tweaked a little, or completely rewritten. Using Arduino allows us to alter the sync pulses, and we can also program our own background patterns to a certain degree. We also don’t have to deal with unreliable shipping for the VGA testers anymore.
VGA4EVA can use any Arduino code you want, but I’m going to provide some examples based on Nick Gammon’s great Arduino VGA tutorial. In order to use these examples, you’ll need a computer with a USB port (Mac or PC). If you’ve never used Arduino before, you’ll need to install it on your computer.
To install the free Arduino software:
1) Go to https://www.arduino.cc/en/software
2) Click on the version that matches your operating system
3) You can choose to donate to Arduino or download the program for free
4) Find the Arduino program file you downloaded and open it. It should look like this:
Now you’ll need to install Nick’s TimerHelpers library. Here’s how to do that:
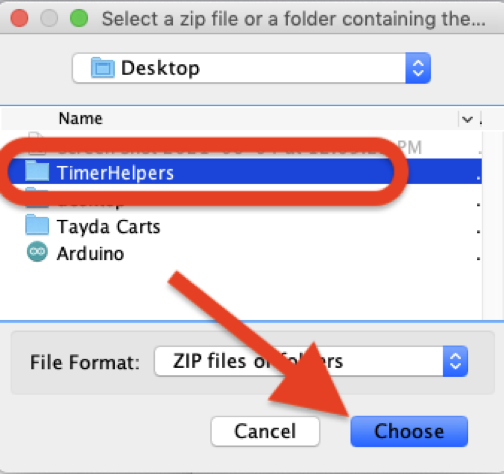
- Download the TimerHelpers file by clicking: http://gammon.com.au/Arduino/TimerHelpers.zip
- Open Arduino
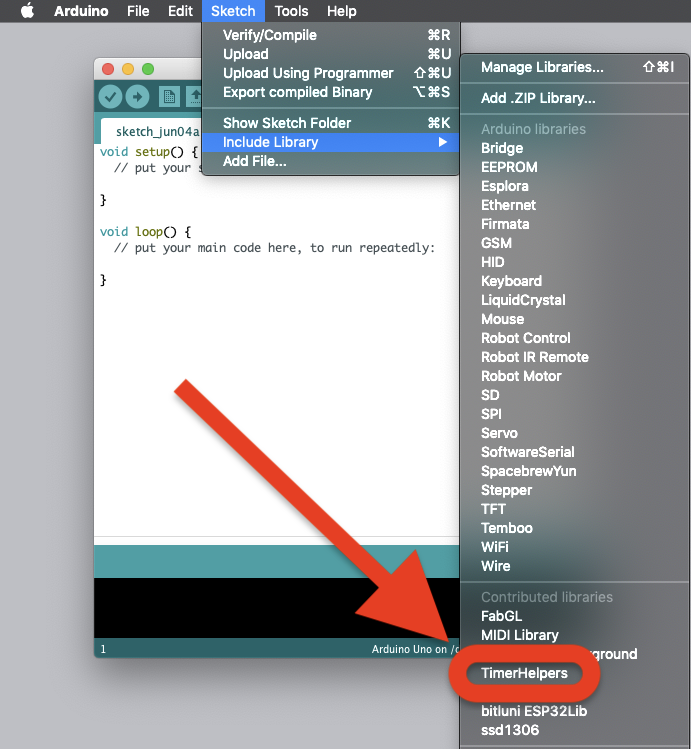
- Click the “Sketch” menu, then hover over “Include Library”, and then click “Add .ZIP Library”

4) Navigate to the TimerHelpers folder you just downloaded and hit “Choose”.
5) The library should be installed now. You can double check by clicking on the “Sketch” menu again and then hovering over “Include Library” again. TimerHelpers should be in the “Contributed libraries” list. You don’t need to click on it or anything — just make sure it’s there. If it’s there, you’re all set — you never need to do this again.
If you’re having trouble installing the library, check this page: https://www.arduino.cc/en/Guide/Libraries
Now for the fun part! We’ll need an Arduino “sketch” in order to make VGA4EVA run. I’ll get you started with that.
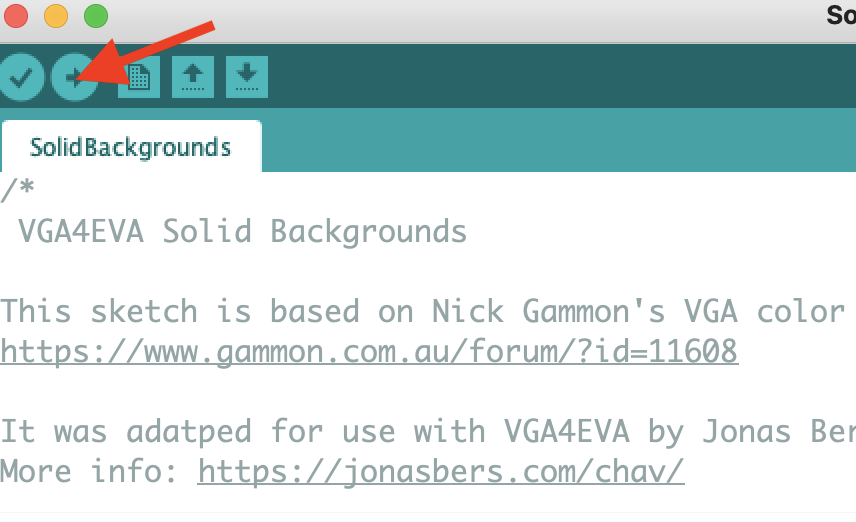
- Download “SolidBackgrounds” from the VGA4EVA Sketches page and unzip it.
- Get out the Arduino and connect it to your computer with the USB cable.
- Open Arduino
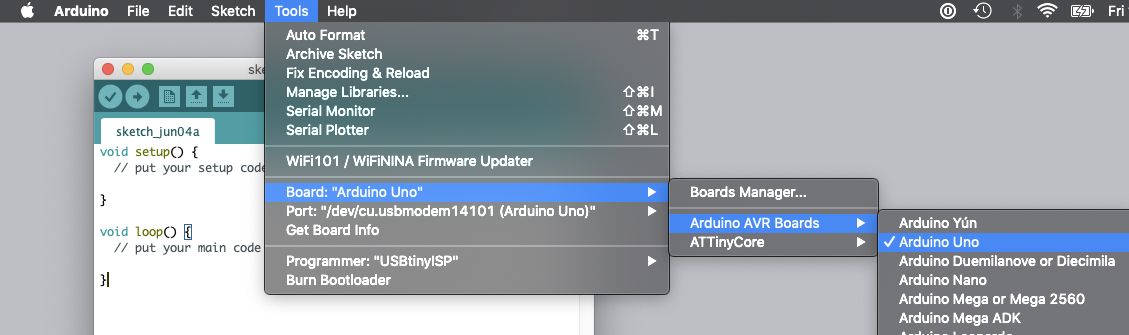
- Click on the “Tools” menu, then navigate through “Board” > Arduino AVR Boards and make sure “Arduino Uno” is selected.
5) Click the “File” menu, then “Open…”
6) Navigate to the VGA4EVA folder and open SolidBackgrounds.ino
7) Hit the Upload button.
There should be some brief messages at the bottom of the window that say “compiling” and then “uploading”.
After that there should be a message that says “Done uploading” and some info, like this:
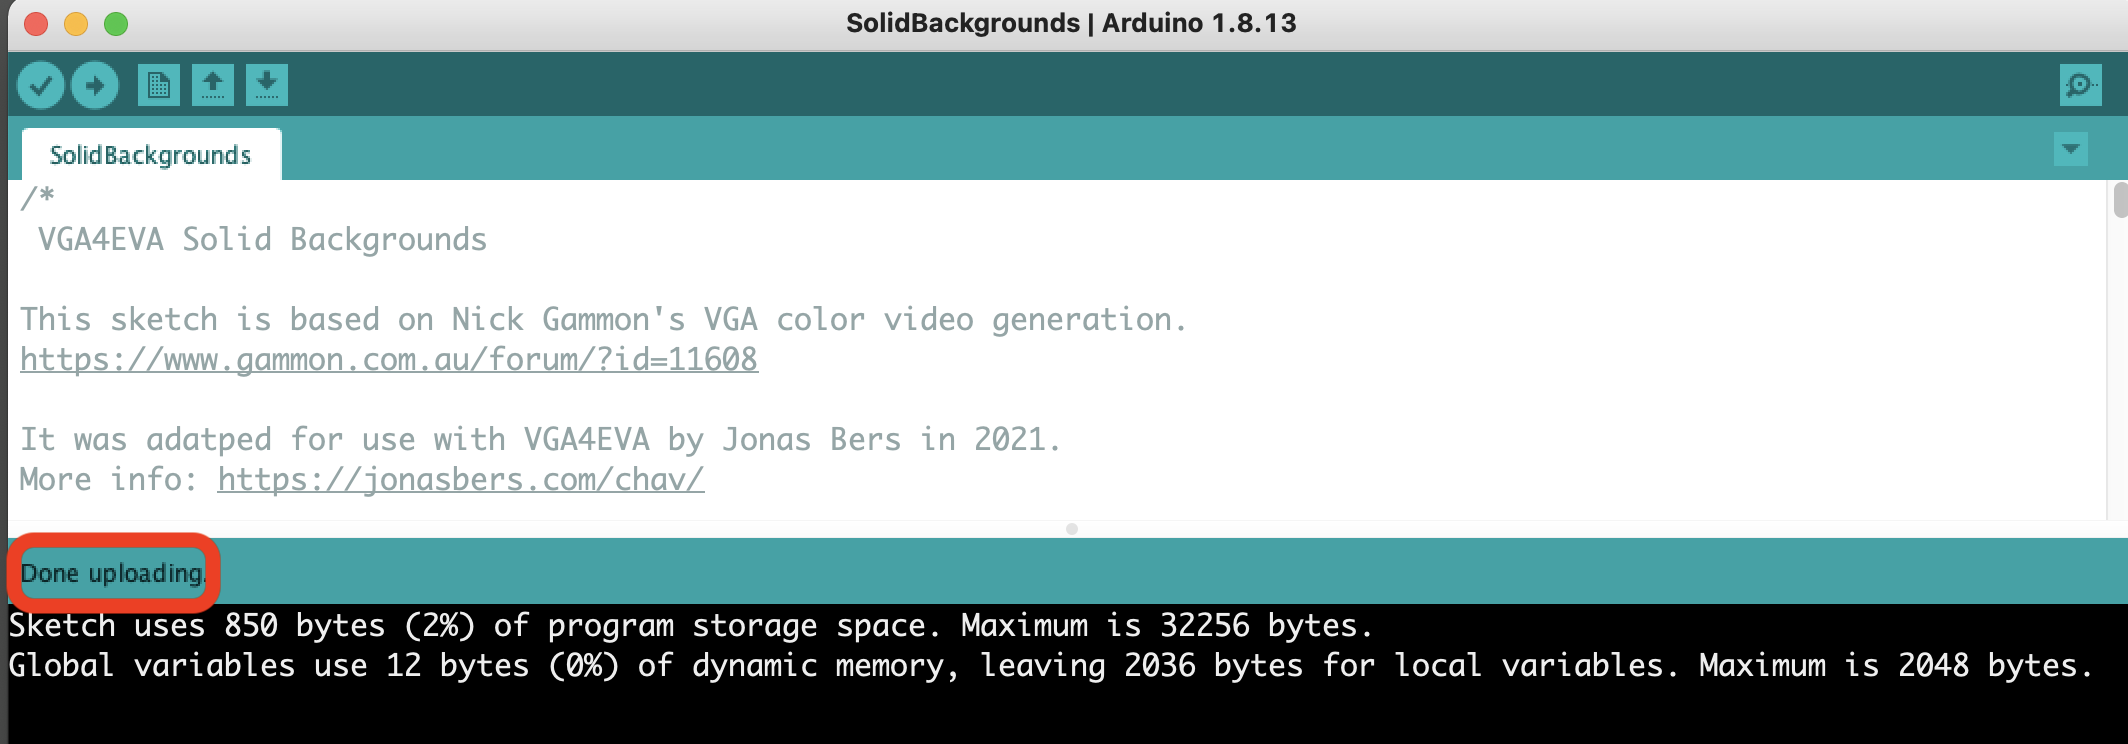
If that all went well. You’re all done with the programming stuff and you can move on. If you’re having trouble uploading the sketch, check out this page: https://www.arduino.cc/en/main/howto
Now we’ll need to remove the ATMega328 chip from the Arduino and donate it to VGA4EVA. Here’s how I do it without bending the pins:
Once the chip has been placed in VGA4EVA, your work is done. You can fire it up and get to making some weird video art. Check out the USER GUIDE for some guidance.
The chip can be programmed as much as you want, you’ll just need to move it back to the Arduino to re-program it. If you see yourself wanting to mess with the code a lot, and you find removing the chip as annoying as I do, you may want to invest in a cheap programmer, like the Pocket AVR Programmer.
With a programmer, you can leave the chip in VGA4EVA, and program it directly from the Arduino software on your computer. The description for Pocket AVR says that it works in Windows, but I also regularly use one without any issues on Macintosh computers too. It connects via USB to the ISP header on the back of VGA4EVA.
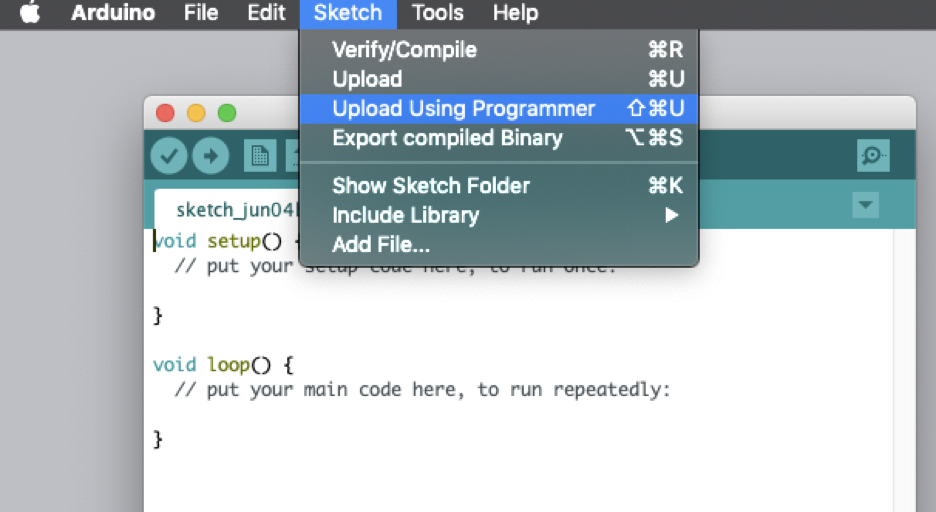
Programming is done the same way, but you just select the programmer (USBTinyISP) from the “Tools” menu:

and then hit “Upload Using Programmer” instead of “Upload”.
Code hacking tips and some more example sketches are coming soon. I just have to find the napkin that all my notes are scribbled on (it’s narrowed down to two places) and upload the rest of the sketches. Shoot me a message if you want to beta any of the other sketches before I do the final tests and upload.
